Bottom Bracket

  • A blog about bike stuff: adventures, buying guides, repairs and maintenance. How to own and enjoy your bike

  • How to Clean Your Bike: A Simple and Effective Guide

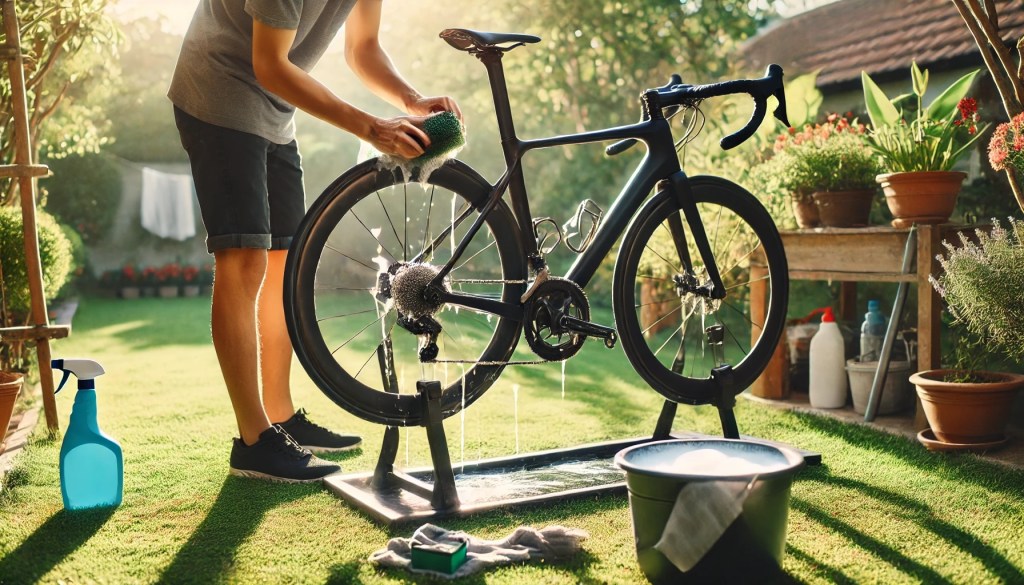
    Keeping your bike clean doesn’t have to be a daunting task. With the right tools and a simple routine, you can keep your ride looking great and functioning smoothly. In this blog post, I’ll walk you through a straightforward and efficient cleaning process that doesn’t require expensive products or hours of effort. Let’s get started!

    What You’ll Need

    Here’s what you’ll need to clean your bike effectively:

    1. Bucket of soapy water: Add a squeeze of dishwashing liquid (any brand will do).

    2. Brush: A car-washing brush, dustpan brush, or similar.

    3. GT85 spray: Great for cleaning and light lubrication.

    4. Rags: One clean and one dirty rag. Old t-shirts or towels work perfectly.

    5. (Optional) Work stand: Helpful for maneuvering around the bike, but not essential.

    Step 1: Pre-Wash Your Bike

    • Cover your bike in soapy water, focusing on removing dust and loose dirt.

    • Be cautious around brake calipers and rotors, but don’t stress too much – soapy water is usually safe.

    • Let the soap sit for a few minutes to loosen grime.

    • Use the brush to lightly scrub the frame and wheels.

    Step 2: Rinse

    • Fill the bucket with clean water or use a hose to rinse off the soap and dirt.

    • Wash all suds off the frame and wheels thoroughly.

    Step 3: Dry and Shine

    • Allow the frame to dry slightly, then spray GT85 onto a rag (not directly onto the bike).

    • Wipe down the frame to remove stubborn dirt or oil marks and leave it shiny.

    • Avoid spraying GT85 directly near brakes or rotors to prevent contamination.

    Step 4: Clean the Chain

    • With the wheels on, backpedal the chain and wipe it down with a GT85-sprayed rag.

    • Hold the chain firmly with the rag to clean all sides.

    • GT85 will clean the chain and provide a light lubricant to prevent rust.

    Step 5: Clean the Cassette

    • Remove the wheels for better access.

    • Use a rag to “floss” between the cassette sprockets, removing dirt and grime.

    • This prevents dirt transfer back onto the chain after cleaning.

    Step 6: Lubricate Moving Parts

    • Use the straw attachment on the GT85 can for precision.

    • Apply a small amount to:

    • Pivot points on derailleurs.

    • Pedals (to prevent creaking).

    • Brake pivots (if you use caliper brakes).

    • Avoid spraying near brake pads or discs.

    Step 7: Clean Your Disc Rotors (if applicable)

    • Use a super-clean, dry rag to wipe down your brake rotors.

    • If contamination occurs, use a specific disc brake cleaner.

    • Avoid touching rotors with your fingers.

    Extra Tips

    • Clean your bike immediately after a ride to make the process quicker and easier.

    • Perform a quick clean after every rainy ride or every 2–3 dry rides to maintain your drivetrain’s performance.

    • Regular cleaning prevents rust and prolongs the life of your components.

    Final Thoughts

    Cleaning your bike doesn’t have to be complicated. With a bucket, some rags, and a can of GT85, you can keep your bike in top shape. Plus, this quick method saves time so you can get back to enjoying the ride.

    Do you have any bike-cleaning tips or product recommendations? Share them in the comments below!

    Now you’re ready to hit the road (or trails) with a spotless bike. Happy riding! 

    December 1, 2024
    bike, bikes, biking, cycling, travel

  • How to choose a bike in 2024

    Top 5 Tips for Buying a Bike in 2024

    Buying a bike in 2024 comes with incredible advancements in technology, but the process can still be tricky. Here are the top tips to make your bike-buying journey smoother and more informed.

    1. Choose the Right Bike for Your Needs

    • Many first-time buyers make the mistake of getting a race bike, which is often designed for professional athletes. These bikes are long, low, and optimized for riders producing elite levels of power—often unrealistic for casual riders.

    • Best option: Start with an endurance bike. These bikes have more relaxed geometry, a taller head tube, and shorter top tubes, making them more comfortable and suitable for non-racers.

    • Examples of great endurance bikes:

    • Specialized Ruby

    • Trek Domane

    • Cannondale Synapse

    • Giant Defy

    2. Understand Geometry and Sizing

    • Don’t rely solely on the labeled size (e.g., “54 cm”). Bike sizes can be misleading as they often reference seat tube length rather than the reach or top tube length.

    • Tip: Focus on the bike’s reach measurement, as it’s harder to adjust compared to saddle height. Misjudging size can result in discomfort and suboptimal performance.

    • Always consult geometry charts and, if possible, try bikes in person to get the right fit.

    3. Prioritize Fit Over Brand or Features

    • Get a bike fit before buying. A professional bike fitting ensures your bike suits your body’s unique needs and limitations.

    • Benefits of a bike fit include recommendations on crank length, handlebar width, saddle options, and even pedal systems tailored to your anatomy.

    • Spending on a proper fit upfront can save you from costly and time-consuming adjustments later.

    4. Be Mindful of Groupsets

    • Don’t overspend on high-end electronic groupsets unless you genuinely need them. Options like Shimano 105 or SRAM Rival offer outstanding performance at a fraction of the cost.

    • Why skip the luxury groupsets? They rarely provide noticeable performance gains for non-competitive riders. Focus on functionality rather than flashy upgrades.

    5. Invest in Quality Shoes

    • Proper cycling shoes are the most important investment you can make after buying your bike.

    • Well-fitted shoes improve power transfer, stabilize your knees, and enhance comfort. Pressure mapping studies show that proper arch support can reduce saddle pressure by up to 50%.

    • Pro Tip: Allocate part of your budget (e.g., £300) for quality shoes rather than splurging entirely on the bike itself. A bike fitter can help you find the perfect pair for your feet.

    Final Thoughts

    Whether you’re buying online or from a shop, being informed about your needs, bike geometry, and fit is key to making a satisfying purchase. Save some of your budget for accessories like shoes and remember—comfort and functionality should always take priority over trends or marketing hype.

    November 30, 2024

  • Bikepacking Essentials

    Top 10 Tips for Your First Bikepacking Trip

    1. Don’t Overpack

    Packing light is key for your first bikepacking adventure. Overloading your bike can make it feel cumbersome and less enjoyable to ride. Stick to the basics:

    • Essential tools and spares

    • Two cycling kits and two sets of casual clothes

    • Minimal toiletries

    Pack one or two luxury items to keep your spirits high but resist the urge to bring too much.

    2. Wear Mountain Bike Shoes

    Road cycling shoes aren’t ideal for bikepacking. Opt for mountain bike shoes or flat pedals with regular shoes. MTB shoes are designed for walking and navigating varied terrain, while road shoes are more fragile and impractical for off-bike activities.

    3. Use a Dedicated GPS Head Unit

    Invest in a cycling-specific GPS unit, like a Garmin or Wahoo. These devices:

    • Offer reliable navigation even without phone signal

    • Have long battery life

    • Free up your phone for emergencies or other uses

    With a GPS head unit, you’ll avoid draining your phone’s battery and stay on track.

    4. Wash and Dry Your Kit Efficiently

    Stay fresh by washing your kit in the shower. Squeeze out excess water, roll it tightly in a towel, and step on it to remove even more moisture. Hang it up to dry overnight—it’ll be ready to wear the next day.

    5. Keep Your Bags in Line

    Streamline your bikepacking setup with bags that align with your bike’s frame. This reduces drag, making it easier to ride, especially if you’re part of a group. Avoid bulky panniers unless absolutely necessary.

    6. Use a Stem Bag for Snacks

    A stem bag or food pouch keeps your snacks within easy reach, encouraging you to eat more often. The easier your food is to access, the better your energy levels—and mood—will be during long rides.

    7. Set Up Eating & Drinking Alerts

    Stay fueled by setting reminders on your GPS device to eat and drink regularly. Alerts every 45 minutes or so can prevent fatigue and bonking, keeping your energy levels steady throughout your ride.

    8. Share Your Location with Loved Ones

    Use a live tracking feature on your GPS device (or pair it with your phone) to share your location with family or friends. For remote areas, consider a satellite tracker like the Garmin InReach Mini for added safety and communication capabilities.

    9. Pack Earplugs and an Eye Mask

    Get quality rest by blocking out light and noise with an eye mask and earplugs. These small items are lifesavers, especially if you’re staying in hostels, hotels, or campgrounds with unpredictable noise levels.

    10. Practice Your Setup Before You Go

    Before embarking on your trip, take your loaded bike for a test ride. This helps you:

    • Adjust to the weight distribution

    • Identify any issues with your packing or gear

    A practice run ensures your bikepacking trip starts off smoothly.

    Bikepacking is all about enjoying the journey and embracing new challenges. With these tips, you’ll be better prepared to tackle your first adventure with confidence. Happy riding! 

    November 29, 2024

  • Useful Tools for Cyclists

    Top 10 Essential Items Every Cyclist Should Own

    Cycling is more popular than ever, and whether you’re new to riding or a seasoned pro, there are a few essentials you should always have on hand. Here’s a breakdown of the top 10 must-haves for cyclists, designed to save you time, hassle, and maybe even the day on your next ride!

    1. Spare Inner Tube

    Carrying a spare inner tube (that’s the right size for your bike!) is a no-brainer. Whether you’re commuting, riding solo, or on a group ride, a spare tube ensures you won’t be stuck after a flat. Even if you’re using tubular or tubeless tires, having a spare handy is smart. Stash one in your saddlebag and repair your flat at home later.

    2. Patch Kit

    Patching a tube is eco-friendly and cost-effective. There are pre-glued patches for quick fixes on the road or more traditional patch kits with glue for a longer-lasting repair. Keep a compact kit in your bag for emergencies and a more robust one at home for serious fixes.

    3. Multi-Tool (With a Chain Tool)

    A quality multi-tool with essential hex keys, Torx wrenches, and a chain tool is indispensable. It’s perfect for on-the-go adjustments and can save your ride if you snap a chain. Choose one with the right mix of tools for your bike.

    4. Ziplock Bag or Waterproof Pouch

    A simple ziplock bag or a dedicated waterproof pouch is ideal for keeping your phone, cash, and small items dry and secure. It’s cheap, lightweight, and a great way to avoid losing things or dealing with soggy valuables when it rains.

    5. Mini Pump or CO₂ Inflator

    Both mini pumps and CO₂ inflators have their place, but a mini pump is a reliable, reusable option for any ride. Choose one that’s durable and can easily reach high pressures. Models with a hose attachment help prevent valve damage. For touring, consider a compact foot pump for added efficiency.

    6. Track Pump (Floor Pump)

    A good track pump is essential for home maintenance. It makes inflating tires quicker and more accurate, especially for achieving precise pressures. If you use tubeless tires, look for one with a pressure chamber for easy inflation.

    7. Some Local Cash

    Always carry a small amount of local cash, like a ten-dollar bill or its equivalent. You never know when you’ll need it for a snack stop, a mechanical emergency, or an unexpected taxi ride. Keep it dry by storing it in your ziplock bag.

    8. Plastic Sunglasses

    Invest in a pair of cycling-specific sunglasses with plastic lenses. They protect your eyes from debris, wind, and sun while being safer in case of a crash. Clear lenses are great for cloudy days or evening rides, while tinted options are perfect for sunny conditions.

    9. Chain Lube

    A bottle of chain lube is a small investment that makes a big difference. Wet lube is great for rainy conditions, while dry or wax lubes are cleaner and ideal for dry weather. Keep your chain clean and lubed for smoother rides and longer-lasting components.

    10. Work Stand

    A work stand is a game-changer for bike maintenance. It holds your bike securely, allowing you to rotate and access every part with ease. While it’s a pricier item, it’s worth it for regular tune-ups and repairs. Choose a clamp-style stand for maximum versatility.

    Bonus Tips

    These items are all fairly affordable, and each one will save you time and frustration in the long run. Got a favorite cycling essential we missed? Drop it in the comments! 

    November 28, 2024
    bike, bikes, biking, cycling, travel

  • What Is a Bottom Bracket?

    If you’ve ever wondered what keeps the pedals on your bike spinning smoothly while transferring all that leg power to the wheels, the answer lies in a humble yet crucial component: the bottom bracket. Tucked away out of sight, this unsung hero is the pivot point for your bike’s drivetrain. Let’s dive into what it is, why it’s essential, and how it’s evolved over time!

    What Is a Bottom Bracket?

    The bottom bracket is the part of a bicycle that connects the crankset (the arms your pedals attach to) to the frame. It sits in a shell at the bottom of the bike’s frame and allows the crankset to rotate. In simple terms, it’s the axle and bearing assembly that lets you pedal efficiently without things creaking, wobbling, or falling apart.

    Without a bottom bracket, you’d be pedaling into thin air. It holds the cranks in place and allows for a smooth transfer of power from your legs to the chain, and eventually, to the rear wheel. Whether you’re cruising on a leisurely ride or hammering it out in a race, a well-functioning bottom bracket makes all the difference.

    A Short History of Bottom Brackets

    The bottom bracket has been around for as long as the modern bicycle. Early bicycles featured simple, often rudimentary bearing systems that were prone to wear and tear. As technology improved, sealed bearings and more sophisticated designs became the norm.

    In the 20th century, the development of standardized bottom bracket sizes, like the classic English Threaded (BSA) bottom bracket, became the foundation for most bikes. As bike technology evolved, particularly in road and mountain biking, manufacturers began experimenting with lighter materials, press-fit systems, and integrated designs.

    Today, bottom brackets come in a dizzying variety of types, each tailored to different riding styles and frame designs. While the basics remain the same, modern bottom brackets have become specialized components designed to maximize efficiency, minimize weight, and fit seamlessly into cutting-edge bike frames.

    Types of Bottom Brackets

    Let’s explore the main types of bottom brackets, how they work, and which bikes they’re typically used for.

    1. Threaded Bottom Brackets

    • What It Is: A classic design where the bottom bracket is threaded into the frame shell.

    • Uses: Found on many traditional road bikes, touring bikes, and some modern mountain bikes.

    • Why It’s Popular: Easy to service, replace, and maintain. The threaded interface keeps the bearings secure and prevents annoying creaks.

    • Example: BSA (British Standard Thread) is a common threaded standard.

    2. Press-Fit Bottom Brackets

    • What It Is: Instead of threading, the bottom bracket is pressed into the frame shell.

    • Uses: Common in modern road bikes and high-end mountain bikes, especially carbon frames.

    • Why It’s Popular: Eliminates the need for threading, allowing for lighter and stiffer frame designs. However, they can be prone to creaking if not installed correctly.

    • Examples: BB86, BB30, and PF30 are popular press-fit standards.

    3. Square Taper Bottom Brackets

    • What It Is: An older design where the crank arms attach to a square-tapered spindle.

    • Uses: Still used on entry-level bikes, older models, and some touring bikes.

    • Why It’s Popular: Affordable and reliable, though less stiff and heavier than newer designs.

    4. External Bottom Brackets

    • What It Is: Bearings are housed outside the frame, rather than inside the bottom bracket shell.

    • Uses: Widely used in modern road bikes and mountain bikes with external-bearing cranksets.

    • Why It’s Popular: Offers better stiffness, easier bearing replacement, and compatibility with modern drivetrains. It also allows for larger bearings for increased durability.

    5. Ceramic Bottom Brackets

    • What It Is: High-end bottom brackets featuring ceramic bearings.

    • Uses: Seen on performance-oriented bikes, both road and mountain.

    • Why It’s Popular: Ceramic bearings are smoother, lighter, and last longer than steel bearings. They’re great for those chasing every watt of efficiency—but they come at a premium price.

    6. T47 Bottom Brackets

    • What It Is: A relatively new standard that combines the best of threaded and press-fit designs.

    • Uses: Gaining popularity in gravel bikes and high-end road bikes.

    • Why It’s Popular: Provides the secure fit of a threaded bottom bracket with the large shell diameter of press-fit designs, ensuring stiffness and compatibility.

    Choosing the Right Bottom Bracket

    The type of bottom bracket you need depends on your bike’s frame and the type of riding you do. Here are a few quick guidelines:

    • Recreational Riders & Commuters: Threaded or square-taper systems are affordable and reliable.

    • Performance-Oriented Cyclists: Press-fit or ceramic options offer increased efficiency.

    • Gravel or Adventure Cyclists: T47 bottom brackets provide durability and compatibility for mixed terrain.

    Final Thoughts

    While it’s easy to overlook the bottom bracket, it’s a critical part of your bike’s performance and reliability. Understanding its role and knowing the different types can help you make informed decisions when buying or upgrading your bike. So next time you’re pedaling away on a long ride, give a little thanks to your bottom bracket for keeping everything spinning smoothly!

    November 27, 2024

  • Top 5 Tips Every New Cyclist Needs to Know

    So you’re jumping on the bike boom bandwagon—congrats! Whether you’re cycling for fitness, commuting, or just to feel the wind in your hair, starting out can feel a bit overwhelming. To help, here are the top five things I wish I’d known when I first started cycling. Let’s roll!

    1. Buy Your First Bike from a Local Shop

    Sure, online deals are tempting, but nothing beats the expertise of a good local bike shop. Here’s why:

    • Expert Advice: They’ll help you choose the right bike that fits your needs (and body).

    • Post-Purchase Perks: Many shops offer free tune-ups as your bike settles in (cables stretch, bolts loosen—who knew?).

    • Support System: If something goes wrong, you have a friendly face to turn to, not an anonymous customer service chat.

    Plus, supporting local businesses is always a win. They’re the unsung heroes when your bike needs a quick fix before a big ride.

    2. Fuel Up: Eat More (Yes, Really!)

    Cycling burns a ton of energy, and you’ll need to refuel regularly. Here’s the deal:

    • Snack Smart: Pack snacks like bananas, energy bars, jelly beans, or even a cheeky jam sandwich. Aim for a bite every 20–30 minutes on long rides.

    • Hydration Hacks: Don’t shy away from adding squash (or sports drink) to your water bottle.

    • Avoid the “Bonk”: Forgetting to eat leads to “bonking” (or hitting the wall)—a dreaded, energy-draining crash. Don’t let it happen to you!

    Pro tip: If eating while riding feels awkward, just pull over. You’ll get better at mid-ride snacking with practice.

    3. Invest in Proper Cycling Gear

    UK weather can be… unpredictable. Stay comfy by dressing smart:

    • Layer Up: Opt for adjustable layers like a base layer, jersey, and a gilet, rather than one bulky jacket. Layers let you adapt to changing conditions.

    • Knee Warmers Are Key: If it’s under 15°C, protect your knees! They’re cheap, packable, and a game-changer for cooler rides.

    • Quality Counts: Good cycling kit can be pricey, but it lasts longer and performs better—worth it in the long run.

    4. Get a Bike Fit Before You Buy

    A well-fitted bike is essential for comfort and performance. Follow this golden rule: Fit First, Buy Later.

    • Avoid Size Mishaps: Bike sizing can be tricky. Some brands’ “medium” might be another’s “large.” Trust a professional to measure you.

    • Long-Term Gains: Spending a bit on a bike fit upfront saves you from discomfort—and costly mistakes—down the road.

    5. Join a Cycling Club (Or Get a Coach)

    Cycling doesn’t have to be a solo sport! Here’s why joining a group or finding a coach is a game-changer:

    • Cycling Club Perks: Meet like-minded riders, learn local routes, and pick up skills like group riding etiquette. Bonus: Motivation for those early-morning rides.

    • Coaching Benefits: If you’re serious about improvement, a coach can tailor a plan to your goals and help you train smarter, not harder.

    If clubs aren’t accessible, even having a friend to ride with and bounce ideas off can make a huge difference.

    Wrapping Up

    Cycling is an incredible journey, whether you’re hitting the roads for fun, fitness, or adventure. Keep these tips in mind, and you’ll avoid common beginner pitfalls. Got questions or extra tips for new riders? Share them in the comments below. Let’s build a supportive cycling community together! ️

    November 26, 2024

  • Top 10 Beginner Cycling Tips for a Smoother Ride

    Starting out in cycling can be a wild ride—literally and figuratively. Here are 10 tips I wish someone had told me before I wobbled onto my first bike. Learn from my (painful) mistakes, and maybe your initiation will be a little less bumpy!

    1. Wear Whatever You Want (But Padded Shorts Are a Game-Changer)

    Sure, you can cycle in jeans if you really want to, but once you experience the cloud-like comfort of padded shorts, you’ll never look back. Pro tip: Bib shorts may look like a wrestling uniform, but they keep everything in place and are surprisingly comfy. Give them a whirl!

    2. Sweets Are for Cycling, Not Just Trick-or-Treating

    Fizzy fish? Jam sandwiches? Chocolate bars? All fair game on a bike ride. Snacking while cycling keeps you fueled and helps you avoid the dreaded “bonk” (runner’s wall but on two wheels). Forget calorie counting—bring snacks and eat often.

    3. Mountain Bike Shoes: The Comfy, Practical Choice

    Those sleek road shoes might look pro, but they’re about as walkable as ice skates. Mountain bike shoes, on the other hand, are comfy, grippy, and won’t leave you waddling like a penguin at coffee stops. Bonus: the cleats last longer!

    4. Spare Inner Tubes > Patches

    Patching a punctured tube by the side of the road? No, thank you. Spare tubes are your best friend—compact, easy to carry, and a real lifesaver when disaster strikes. Leave the glue and patches at home.

    5. Master the Art of Layering

    Cycling weather is like British weather: unpredictable. One moment you’re overheating on a climb, the next you’re freezing on a descent. Forget thick winter jackets—opt for thin layers and a windproof gilet. Zippers are your thermostat.

    6. Time, Not Distance

    Stop obsessing over kilometers! A hilly 50k can feel like Everest, while a flat 100k might be a breeze. Instead, plan rides by time and focus on effort rather than comparing Strava stats. You’ll be saner for it.

    7. Clean Your Drivetrain (Yes, Every Ride)

    Neglect your chain, and your wallet will suffer. A quick wipe-down after every ride saves your drivetrain—and your bank balance. Soap, water, and a bit of chain lube are all you need. No excuses!

    8. Refuel Fast After Rides

    Within 15 minutes of finishing a ride, get those calories in! Regular food is fine—bananas, sandwiches, or even leftover pizza (no judgment). Recovery isn’t rocket science; it’s about replenishing glycogen, repairing muscles, and not passing out in the shower.

    9. Drafting Is the Ultimate Cheat Code

    Want to save 30% of your energy? Ride behind someone else! Drafting is the legal way to cheat on a bike. Work in a group, take turns at the front, and enjoy the free speed. Just don’t get too close on your first try.

    10. No Rules, Just Ride

    At the end of the day, cycling is about fun. Wear what you want, ride what you want, and ignore the gear snobs. The only rule? Enjoy yourself. Because let’s face it: nobody looks good in Lycra anyway.

    Go forth, pedal warriors, and may your rides be smooth, your snacks plentiful, and your bib shorts snug!

    November 25, 2024

Blog at WordPress.com.


Loading Comments...
 

    • Subscribe Subscribed
      • Bottom Bracket
      • Already have a WordPress.com account? Log in now.
      • Bottom Bracket
      • Subscribe Subscribed
      • Sign up
      • Log in
      • Report this content
      • View site in Reader
      • Manage subscriptions
      • Collapse this bar